One Year Later: Some Thoughts on the Flood
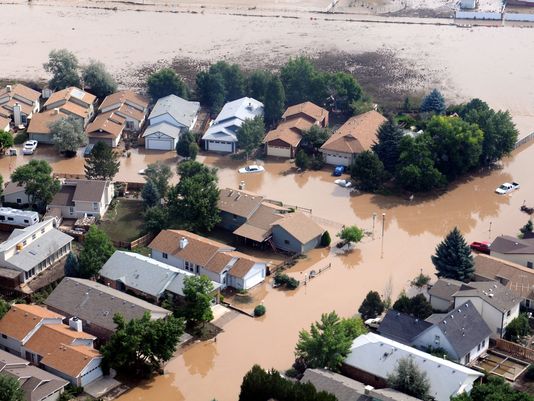
Exactly one year ago, Boulder and its surrounding counties were in the middle of several solid days of rain that quickly became a thousand-year storm and a hundred-year flood. We were all affected in a myriad of ways by the destruction, sadness, and anxiety that resulted, whether our homes were impacted or not. Sometimes, on a crisp blue-sky day with the Flatirons sparkling in the sun, it seems surreal amid such beauty that such devastation could actually have taken place.

OandRBlog-9-11-14-IM1.jpg

Like for so many, the night of the flood was a scary experience for me. I had been evacuated before for fire and had been woken up in the middle of the night by earthquakes, but this was a different kind of fear. My house and my office, two separate buildings on my property, are both in the flood plain.

OandRBlog-9-11-14-IM2.jpg

By the time the flood started, it had been raining non-stop for three days. I had been on a relocation all day and got home at 9:30 that night. When I walked across my lawn I actually sank into the grass so deeply that the water filled my shoes. My neighbor told me to check my backyard, since hers was filling up. I watched in disbelief as my street became a river and water started pouring towards the house.

My stand-alone office is an outbuilding in my backyard. When I saw that the far end of the yard where my office and shed are was beginning to slowly fill with water, I raced out there to put everything up on the desks, unplug the electronics, and save what could be saved as it became clear that flooding was inevitable (if only I had remembered the files in the bottom drawers!) At the time, riveted by fear, I didn’t realize how lucky I was that my house had been spared. I measured 19 inches of water in my office--much less than many people had, but plenty for me. I had so much adrenaline and fear coursing through me that sleep was elusive for several nights. 

OandRBlog-9-11-14-IM3.jpg

I am in the business of helping people organize and streamline their lives. What better time was there to offer my services? My team and I donated our time to several clients whose homes were destroyed; shoulder to shoulder we dug through kitchens, laundry rooms, living rooms, and basements of mud and soaking wet cardboard to try to salvage anything possible. One client had three feet of mud in her living room; another one had unwittingly opened her front door and ushered the flood in. I encouraged people to donate household items as freely as they felt they could.  So many families were--and still are--in need of replacing everything.

OandRBlog-9-11-14-IM4.jpg

The camaraderie of our community during that time was incredible. So much caring, so many offers of help; neighbors checking in, friends who didn’t flood on Wednesday coming and helping on Thursday, to whom I returned the favor when they ended up flooding the next night.

I had my own clean-up project going at the same time I was helping my clients. It took six of us a full week to clean up the mud and filth in my 200-square-foot office, and then I had to replace the floor, some walls, carpet, and paint. (During that time my dining-room table functioned as Org & Relo’s makeshift HQ.) When the sun eventually came out and the waters receded I was amazed to see that all my new landscaping had vanished and that every single item in the yard had relocated itself elsewhere; chairs, tables, sawhorses. And here’s the real irony: I spent $5000 to get my office up and running again (neither flood insurance nor FEMA cover outbuildings) and then an unusually heavy day of rain on June 6th flooded it again. It wasn’t as bad this time, but reliving the stress was intense. Fortunately, I had learned a few lessons from the last time. I guess that old adage is true: when it rains, it pours.

OandRBlog-9-11-14-IM5.jpg

I know things have settled down a bit since the flood a year ago--roads are repaired, schools are in session, debris has been carted away--but many people are still suffering tremendously. As of this week, 68 homeowners in Boulder County are waiting to hear if FEMA is going to buy out their destroyed properties so they can move forward with their lives. Shockingly, many dislocated people are still paying mortgages on uninhabitable properties AND paying rent where they now live.

Anniversaries always seem to make us reflect--speaking of which, it’s September 11th, already an emotional day in our country--and as I think back on lessons learned since the flood I thought maybe I could offer some insights. Nobody wants to think this could happen again, but if it did, my question is: How can we be even smarter in the way we set up our homes?

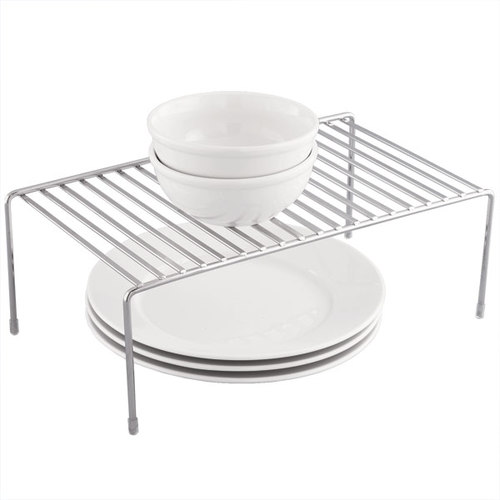
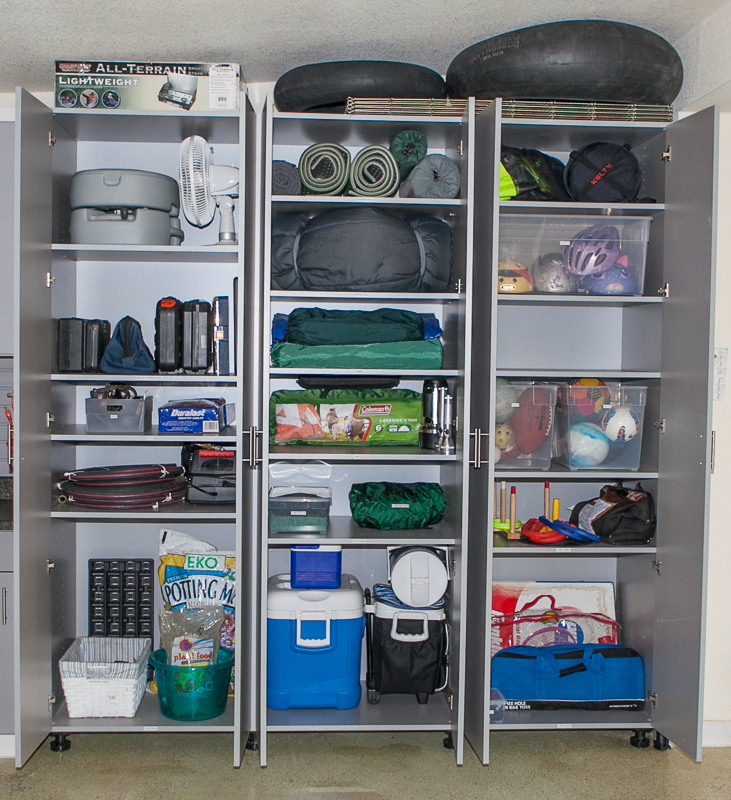
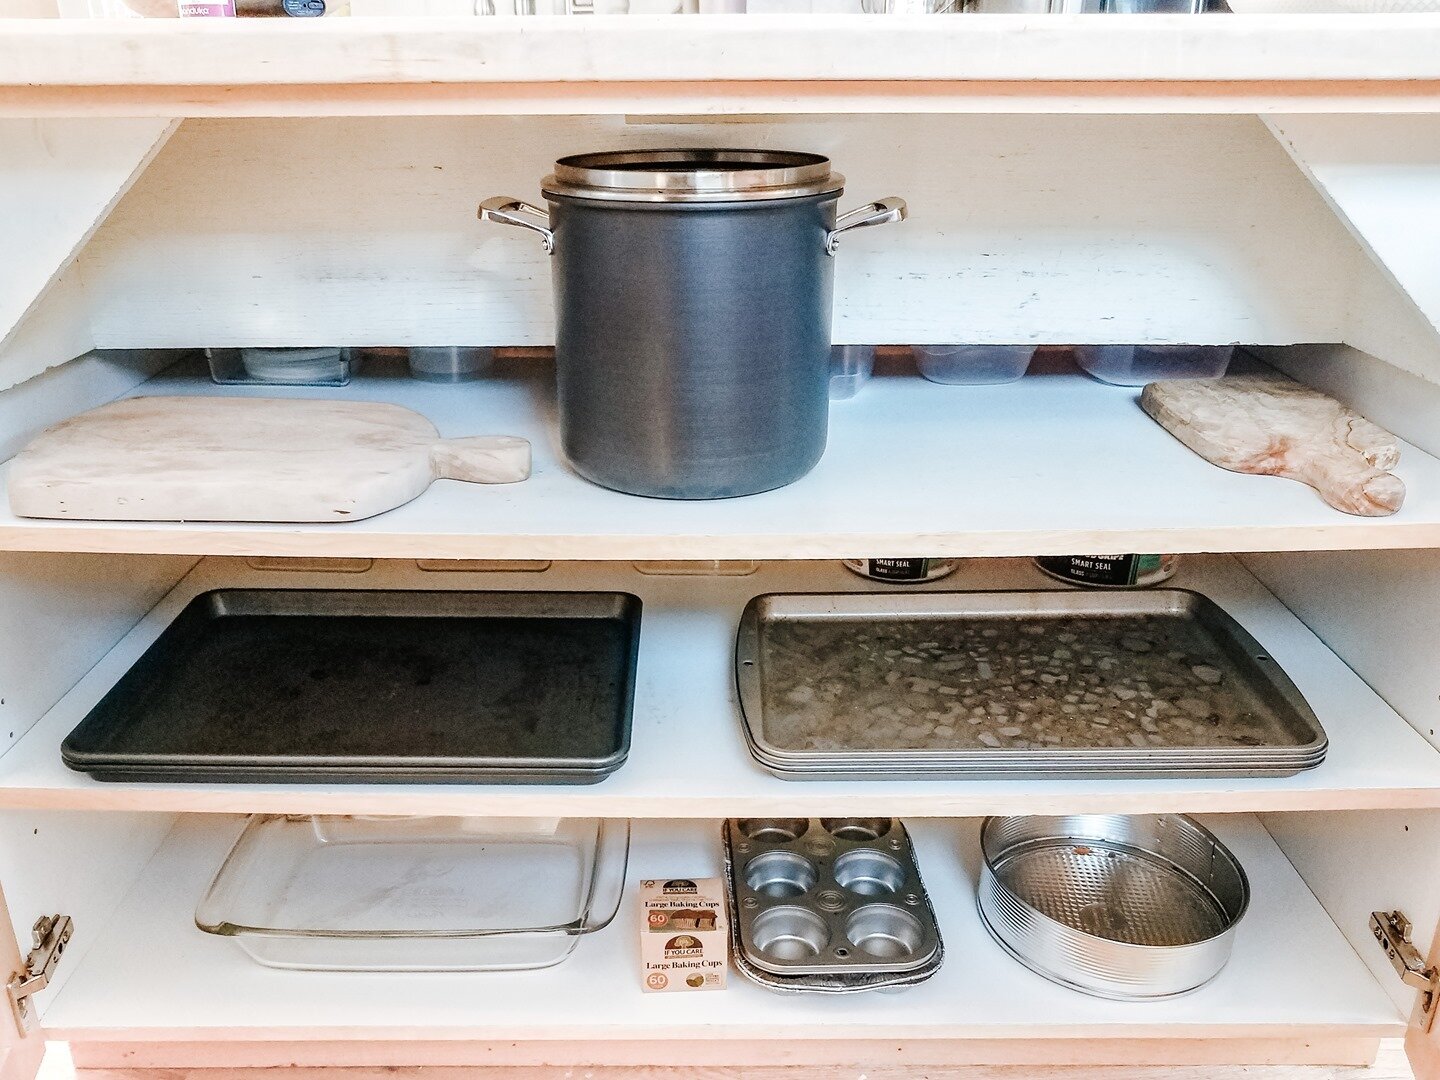
  • Elevate items off the floor in basements and garages on cinder blocks; if you don’t have the room use quality plastic bins with lids (not cardboard boxes) on floors

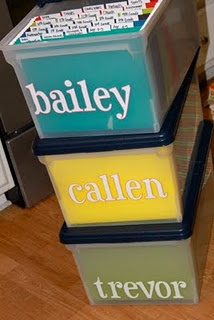
  • Keep a full set of important personal docs in an easy-to-grab place as well as backed up on the cloud

  • Always store anything with an electrical cord on an upper shelf

  • Evaluate storage areas--make a habit of purging excess, unnecessary “stuff”

  • Keep gutters clear of leaves and debris and use gutter extenders to move water away from your house

  • September is National Disaster Preparedness month--check out www.ready.gov for more tips and tricks

I usually sign off with “happy organizing!” but it somehow doesn’t feel quite right after a post like this. I think I’d rather say thanks for reading, and to my Boulder readers in particular: may today find you in better circumstances than you were a year ago.

Stay safe and dry,

Sheryl

Not Just Another Pretty Screen: Digital Desktop Tuneup

Since more than 75% of American adults use computers either at home or at work, it’s probably time we got better at learning how to clean and organize them. I recently saw a computer desktop that had hundreds of files scattered across it like a bad case of screen acne. It made me realize that a cluttered computer desktop has the same unbalancing effect as a cluttered desk surface in your home or office - it makes you feel chaotic and mildly out of control.

OandRBlog-9-4-14-IM1.jpg

Before we get into the nitty, let’s attack the gritty. Dr. James Francis, a British microbiologist, did a study a few years back in which he took samples from 33 office keyboards in London. He then compared these culture samples to swabs taken from toilet seats in the same buildings. Yup, you guessed it. The average office keyboard had germ levels up to five times higher than those commonly found on a toilet seat.

So what do you say we clean these germ factories up?

First power down everything. If you’re a stickler, you’ll want to go with purchased cleaners and cloths that are meant for computer use. If not, you can use common household items.

OandRBlog-9-4-14-IM2.jpg

Clean your screen with a microfiber cloth or a cotton bandanna, as paper towels can scratch. Spray the cloth, not the screen, with an equal mix of vinegar and water and wipe carefully.

Use a dry paintbrush to dust the keyboard. A Post-It note folded over will get out any stubborn crumbs or mysterious substances (or you can blow off the keyboard with an air compressor for the same result). A Q-tip lightly dipped in alcohol will clean between the keys--just make sure no liquid finds its way below decks.

Lastly, clean the desk or area your computer is on. Wrap and label cables and get them out of sight.

Now that the housing is cleaned up, let’s get to the interior of your system. I’ll just give broad advice, and you can adapt the general ideas accordingly depending on whether you use a Mac or a PC.

OandRBlog-9-4-14-IM3.jpg

First you need to decide which files can stay and which can go. Downloads you still haven’t referenced, large video files you’ll never watch again, rough drafts of reports long submitted...highlight all the ones you don’t even have to think about getting rid of and drag them en masse to the trash can. Don’t get into the micro details right now--just put any you’re not sure of into a Pending folder you can sort through over time. You should be left with only those files that are active and that you’re sure you want to keep.

Like any organizational project, you have to occasionally use a tool to simplify the process. In this case: folders. Set up folders labeled with the same general categories you use in your paper filing system--Home, Finances, Work, etc. You can also set up subfolders within these categories, but beware of going too deep with these. Now reassign the remaining files on your screen into the proper folders and organize them into a row from your pull-down menu.

If you automatically save to your desktop, folders will now allow you to save directly into the correct one. How fabulous is that? When labeling, make sure you’re concise but detailed so you can access the file you want efficiently.

Files you don’t want to get rid of but also don’t need to access often (if at all) can go into an Archives folder.

With your screen looking a little more Zen, snazz it up with a new wallpaper, and now let’s make sure your operating system is in tip-top shape.

  • Get rid of apps you don’t want from your applications folder by using an uninstaller to capture the app plus all the associated files that can hang around and hog space.

  • Update your antivirus software and run a full scan.

  • Set your computer to use automatic updating to make sure your software is the latest and greatest. (Software obtained through these channels is trustworthy.)

  • Clear internet data. As you surf around on the internet, you drag along bits and pieces that eventually slow down your system.

  • If you’re trying to protect your privacy, you have to delete both text-based cookies and flash cookies. Different browsers use different methods. You can research them here.

  • Back up to the cloud or any external system that works for you.

OandRBlog-9-4-14-IM4.jpg

Sitting down with your cup of morning coffee to a sparkly clean and organized computer is a fabulous way to kick off your day. Set aside 15 minutes at the end of your work week to clean up folders, delete items, and make sure your screen is fresh-faced for the next week. Your Monday morning will thank you.

Happy Organizing!

Why “The Container Store” will always be “The Candy Store” to Me

Okay. It’s time for a true confession. It’s been a while since the last one when I revealed that I, the Maven of Minimum, have three ice-cream makers. I know--shockers! Well, here’s the next big reveal.

OandRBlog-8-28-14-IM1.jpg

The Container Store is my favorite place to shop.

I love it so much that, yes, my colleagues and I here at Org & Relo refer to it as The Candy Store. They have a sweet solution no matter what your taste, their service is impeccable, and their products cater to all design styles and tastes. Bottom line, if you shop there you simply can’t go wrong.

(You should know that I don’t get paid or perked for telling you this. I’m just a fan, spreading the word.)

Since I buy much and often here, I thought it might be fun to tell you about my five favorite candy store items. These are my go-to organizing top picks for almost any job I’m on.

Linus Drawer Organizers

OandRBlog-8-28-14-IM2.jpg

Linus clear organizers come in several shapes and sizes and are perfect for bathroom, kitchen (drawers, pantry, fridge), crafts, and anywhere that drawers or cupboards need to be whipped into shape. You can use the deep ones for kitchen junk drawers and bathroom cosmetics and the shallow ones for cutlery and utensils. All you need to do is take the inside measurements of the drawers you’re organizing, go to The Candy Store, and then map out the Linus products on the floor until you get the right config for your plan. It’s the best kind of puzzle! Make sure you consider in advance how you want to divide and store your items so that you get the sizes that work best, and use the same depth for each drawer for a consistent look. You can also use them on shelves or open surfaces--the non-slip rubber feet keep them solidly in place.

OandRBlog-8-28-14-IM3.jpg

Frosted Totes

These simple bins that come in small and large will work in many different areas of your home. I love them in the bathroom to corral larger bottles like moisturizer and mouthwash or under the sink for hairdryers and brushes. You can also use them in your child’s room for toys since they’re light and easy to grab, on the coat closet shelf for gloves and hats, or inside your entertainment center for DVDs. Put a couple small ones on a pantry shelf for loose granola bars, kids’ snacks, or random jars that always seem to be traveling around without warning.

OandRBlog-8-28-14-IM4.jpg

Chrome Cupboard Shelf

I use these to eliminate dead space in under-the-sink cabinets (in these areas often the plumbing can get in the way of shelving options) or any place where I need to make better use of vertical space. Take an overview of your kitchen and pantry cabinets and see how these can magically create more space, especially in a tiny kitchen. They also make taking down stacks of dishes easier when they’re separated instead of being piled in one gargantuan stack. One of the things I love best about The Candy Store is how much thought goes into the design of the products they carry: in this case, the wires are flat to hold items securely and the lip at the back stops things from sliding.

OandRBlog-8-28-14-IM5.jpg

Clear Storage Boxes

These inexpensive plastic boxes are transparent enough that you can easily see the contents on lower shelves, but it’s a good idea to label them when using them for storage. All kinds of random collections can go into them: gift wrap, winter wear, first aid items, fabric swatches, kids’ crafts, as well as what they are designed for: shoes, accessories, and sweaters. A smart move when storing shoes is to take a picture of each pair, affix it to the front of the box, and then stack the boxes with the photos facing out; makes it super easy to select your footwear.

OandRBlog-8-28-14-IM6.jpg

Huggable Hangers and Ultra-Slim Finger Clips

This seems like a small thing, but I assure you it’s not. You know how you used to buy all those different hangers for skirts and dress pants? Well, those days are over! Grab a few stacks of huggable hangers (great for maximizing space in your closet) and then add a couple boxes of clips. Now with two quick squeezes you can transform a shirt hanger into a skirt hanger--and then transform it back, any time you want. Plus the hangers match each other and give your closet a thoughtful, consistent look. A professional organizer’s dream!

Keep this in mind as you cruise the aisles of The Candy Store, looking to satisfy your personal cravings: 51% of anything is looks and 49% is function. I firmly believe that if you don’t think it looks good, it will not function for you. So make sure you buy what you love; then sit back and watch it work its magic!

Happy Organizing!

Back to School... Again! How to Save Money and Time by Shopping at Home First

One of my favorite things to do as a professional organizer and productivity consultant is introduce my clients to the concept of shopping at home. I know I’ve mentioned this before, but now that it’s back-to-school time, let’s dive into it with a little more depth.

OandRBlog-8-21-14-IM1.jpg

When things are in their place and we know where that is, we tend not to  become repeat buyers--as in purchasing things we already have. For example, when we buy dish soap we usually put it under the sink, right? When it’s gone we replace it, and so on. But when we’re buying items that don’t have an obvious place, sometimes they get stashed elsewhere and then we forget about them. How many times have you opened a low-rotation cupboard to find something you were looking for that you’ve maddeningly since replaced?

Getting ready for back to school is a perfect time to survey anything you may have tucked away “for later” and to shop at home in general. Before you head out with your kids to purchase all new stuff, do these few simple things to save your family time and money.

OandRBlog-8-21-14-IM2.jpg
  • Go through clothes--including shoes and coats--with your children to establish what needs to be donated, what should be tossed, and what can be passed on to a sibling or friend. Children grow so quickly that they often don’t have enough time in the saddle to truly wear clothes out, so hand-me-downs at younger ages tend to be less worn. Once you’ve done this and have a solid idea of what they have, you’ll have a better concept of what they need.

  • If you didn’t do this at the end of the school year, now is the time to empty, clean, and spruce up backpacks. Shake them out outside, and use a damp cloth to rid them of crumbs and other mystery items. Good quality backpacks are essential for kids since they have to carry several textbooks every day, so if your child is making a move from a kid pack to a more adult version, look at what your family has for day hikes that might be suitable and let them trade up that way.

  • Go through last year’s school stuff to see what can be salvaged in terms of binders, folders, lined paper, pencils, markers, pens. Get rid of anything that doesn’t need to limp along for another year and then sort through what’s left. You can divide the used items among your children and then round out their needs by purchasing a few new things for each of them.

  • If you’re someone who buys things when they’re on sale to be used down the line, check out the area where you stash that stuff (with luck you know where that is!) to make sure you didn’t tuck anything away that would work for back to school.

OandRBlog-8-21-14-IM3.jpg
  • Don’t head straight to department stores--see what you can find first in the world of discount retailers or thrift stores, especially for shoes and clothing. If your kids refuse to shop there, don’t hesitate to buy for them to try on at home; discount retailers all have super smooth return policies. (I have a friend whose middle-school daughter’s favorite jacket was a $3 thrift store buy. She just neglected to mention where she got it!)

 Getting your kids ready for another year at school doesn’t have to break the bank. By shopping at home to reuse and upcycle you can save time and money while teaching your children valuable life lessons in the process. How’s that for a win-win?

 Happy Organizing!

College Confidential: Wrestling Your Dorm Room into Submission

Last year the National Retail Federation estimated that parents spent an average of $907 to outfit their “child’s” dorm room. Gone are the days of the plain Jane room with the Peter Gabriel poster and a few thrift store items tossed in for good measure (brick and board bookshelves, anyone?) These are the days of bed-in-a-bag, ergonomic desk chairs, and machines that magically have your coffee waiting when you roll out of bed for that 8 a.m. stats class.

OandRBlog-8-7-14-IM1.jpg

Whether you go the $900 route or the try the scaled-down version, setting up a college dorm room is an exercise in exactitude: what is really needed, what fits where, what works best, and how to make it all look good. Every minuscule dorm room comes with the basics--bed, desk, chair, dresser, closet--and then you’re pretty much on your own. That’s where the exactitude comes in.

OandRBlog-8-7-14-IM2.jpg

First do a little research on the dimensions of your room, what’s already there, and what’s prohibited. Why buy all those fairy lights if your Resident Assistant is just going to make you take them down? Make sure you double check what size sheets you need--dorm beds usually all require the extra-long twin variety.

Set a realistic budget, and don’t fall prey to thinking you need everything right away--better to go with the “less is more” philosophy for such a small space. Before you head off to Bed, Bath & Beyond with a giant list, shop at home first. Yes, you will need a desk lamp, but you also won’t need the one currently on your desk at home. Start looking around. What can you take from your current digs that will provide a little warmth from home and also save some cash?

Make contact with your roommate to ensure you’re not doubling up on small appliances, rugs, or shared accessories. If your college offers free printing, you may not even need to waste valuable dorm-room real estate on a printer.

Think of your room as geographically divided up into five tiny, distinct spaces:

  • sleep

  • study (read)

  • kitchen

  • work (computer)

  • grooming

Then focus on what items you need for each of those areas and how you can best organize and store them.

Use a hanging organizer either for shoes or to keep smaller items organized, labeled storage boxes with lids that will slide under your bed or stack to keep things out of the way, a shower caddy to cart your necessaries to the bathroom (don’t forget the flip-flops for in-shower use!), and maybe a book safe for valuables if needed. Use space-saving huggable hangers and cabinet shelves in your closet.

OandRBlog-8-7-14-IM3.jpg

Some colleges allow you to use blocks or bed risers to create valuable under-bed storage or living space in your room. Over 70 colleges now partner with Bedloft, which provides lofting services as well as microfridges and hangers for TVs.

The big retailers like Target and BB&B offer services like “buy here, pick up there” and also host shopping events after hours exclusively for college students. There’s a reason the back-to-college business is $50 million and growing! But does your trash can really have to match your duvet cover? Don’t fall prey to marketing. Remember: your room is tiny and the more stuff you cram in there, the less room for you.

You’re going to spend a lot of time over the next nine months in your dorm room, so make sure it’s comfortable, functional, and reflects who you are. Don’t forget you can always add things you need along the way once you see how your initial system is working. One thing is for certain: Target will never turn you away.

Happy Organizing!

Decluttering 101

Someone recently asked me about the biggest challenge I face when helping clients organize their homes and offices. A couple answers are always way up there, but I have to say the one that consistently tops the list is the same old friend:

CLUTTER.

Here’s the thing about clutter: It spares no one. Yes, even someone with almost ten years in the Professional Organizing business can look over at her desk or kitchen counter to find a pop-up clutter convention taking place that no one invited her to. (Let me quickly add that it takes me minimal time to restore order and send that clutter packing. But still!)

I think of clutter as visual chaos. Like any kind of chaos, it stresses us out and doesn’t allow us to relax. The strange thing is that, even if we can’t see it, it still affects us. The “out of sight, out of mind” rule doesn’t apply when you stuff things in a drawer and jam it shut or stack a bunch of boxes full of who knows what in your garage. It just becomes energy that gets stuck and starts to stagnate. Yuck.

I tell my clients that decluttering is a beautiful thing because of the way it makes room for the things that really matter in our lives. In addition, it makes our lives more peaceful, joyful, and serene.

Here are five ways you can show the clutter in your life who’s really in charge.

1.  Just get rid of these things--I mean, seriously: why are you keeping them?

  • Trash

  • Broken stuff

  • Duplicates

  • Things you hate

  • Gifts you never bonded with (just because Aunt Gert gave you her gravy boat doesn’t mean you have to keep it)

  • Any gadget unused for a year

2.  If you’re so overwhelmed that you don’t know where to begin, try starting with one small area that haunts you the most--a section of kitchen counter, a small table top. Organizational guru Peter Walsh advises that you spend ten minutes a day decluttering--once you start seeing the difference that even a baby step like that makes, you may spin it out to twenty minutes.

OandRBlog-7-15-14-IM2.jpg

3.  Pick up five things, and return them to their proper location. These should be items you’re used to seeing deposited on counters or floors; mail, the dog’s leash, a newspaper section, your daughter’s hair clip, random sport socks. If you don’t have a designated place for them, think about one that would suit, and start using it all the time. Make sure the kids know where things belong, and get them on board with putting things away (labels can really help with this). Try to make it a habit for everyone to put things in their place.

4.  Give yourself the gift of a “Maybe” box that you can put things in for now. Sometimes, even though we know we should get rid of something, we can’t quite let it go. Look at the random selection you’ve kept a few months down the road--chances are it will all go straight to donation.

5.  Be a more conscious shopper so that you’re not filling your decluttered home with more clutter. Whenever you see something you want, add it to an ongoing list with the date you first saw it, and then revisit the list 30 days later. You may find when you check back that the urge to purchase it has gone. And if you do decide to get it, at least you’ve given the item the time and consideration it deserves. Make sure to shop in your own home first, however. That way you won’t buy a repeat package of sponges when you already have two others under the sink.

OandRBlog-7-15-14-IM3.jpg

Living in a cluttered home or trying to work in a cluttered office is an exercise in frustration. Car keys get swallowed up, you can’t locate your important report in time for your meeting, or you replace something you can’t find only to have the original turn up shortly after. Isn’t that the worst? Make sure that never happens again by getting clutter under control... one random sport sock at a time.

Happy Organizing!

Storing Schoolwork, Artistic Masterpieces, and Precious Papers... Oh My!

OandRBlog-6-12-14-IM1.jpg

You know the drill. The school year ends and your kids come home with the special things they’ve kept in the classroom all year; paintings, drawings, maps, awards, reports, essays, and projects. The really young ones want their creations hung up for the world to admire, and you can’t help but marvel as the years pass at how they’ve learned to sign their names, capture a flower, or draw a torso wearing a shirt instead of just a belly button.

The question is: what to do with it all?

Since we’re all about systems at Org&Relo, I’m going to offer up two--one soft, one hard--that might work for you to keep the kids’ paper tornado from taking over your house, one smiling stick figure at a time.

Soft Copy System

This solution is by far the least labor intensive--as well as being a space saver. The art or schoolwork comes through the door, gets photographed, gets stored in a file on your computer, and the hard copy gets tossed. No fuss, no muss! But if throwing away your mini Picasso’s work breaks your heart, you might consider the next option.

OandRBlog-6-12-14-IM2.jpg

 Hard Copy System

  • Designate a Temporary Holding Station

You can use a magazine box, a file folder, or a clear plastic box with a lid--whatever you choose, assign one for each child. For larger artwork, we recommend the underbed drawer from The Container Store. Then as the papers arrive during the year, you can decide with your child what’s special enough to keep and store it inside. (A good rule of thumb is that if it’s deserving enough to be in a frame or photo album, it stays.) This helps them choose what is valuable to them and also helps them learn how to let go of things that don’t have a gold star in their eyes.

  • Date... Everything!

If items aren’t dated, take a moment to add a date on the back of each paper. This will keep a chronology of your child’s progress and will make the pile easier to sort when it comes time to create a more permanent home.

  • Sort with Your Child’s Help

Once the end of the school year arrives and you’ve gathered the full nine months of your child’s precious papers, sit down with him or her and go through what you’ve kept during the year. Sometimes it’s easier to purge when the entire collection is in one place. Encourage your child to think about what’s important to keep and what he or she won’t miss if it’s added to the recycle bin.

  • Use a Binder and Sheet Protectors

Assign a large binder and insert the art into sheet protectors. Use tabs to label by year or semester. Since binders are bulky and take up valuable storage, you only want to have one per child (which also helps in the winnowing process). I’m not usually a fan of binders; some people like to jam them with random papers they don’t want to go through and then use them as an excuse to look organized. (You know who you are!)Keep in mind that this won’t be something that just gets shoved away in a dark closet. They are keepsakes that kids revisit to examine their growth and progress.

Once you’ve created this system, it’s easy to add to it as the papers arrive home. If that works, you could give up the holding station and just keep the binder stacked with empty sheet protectors.  You can create the same hard-copy system using a file box with folders for each child, but it doesn’t make it as easy for them to pull out and examine like a photo album.

Neither of these systems accounts for the inevitable 3-D artwork made from clay, papier-maché, or other mystery substances. Professional Organizer Peter Walsh has views on those: “If you or your child really want to hold on to the piece, make sure that it is displayed in a way that not only honors its importance but also protects it from dust and damage.  If a piece is not honored and respected then it has no place in your home--whether it's a science project or a family heirloom.”

Touché! I couldn’t agree more.

Happy Organizing!

One Barbie at a Time: Organizing Your Kids’ Rooms (with Their Help)

Some kids are convinced that a room is clean if everything is shoved in the closet and out of sight; others think that as long as they keep their door closed, no one will be the wiser. We adults know better.

Now that another school year is filed away and the kids are home during the day, it’s a perfect time to take on organizing their rooms. Incorporating your child into the process is the only way to go; if (usually in a fit of “I can’t stand it any more!”) you do it yourself, you’ll end up always doing it yourself and you won’t empower your children toward their own independence.

Julie Morgenstern, author of Organizing from the Inside Out, recommends that you be an “organizing consultant” to your children. Sit down with them and make a list of what they want in their bedrooms, along with what’s working and what’s not. Do they want an art headquarters? How important is an easily set up sleepover zone for friends? Are they bookworms or dress-up queens? What’s most important to them?

Once you’ve come up with a list that accurately represents what they want, set aside a couple of days that work for them and for you, get all hands on deck, and start the transformation.

Linda, one of Org&Relo Boulder’s Professional Organizers and mother to two teenagers, says that kids respond to structure. “Our job as parents is to impose structure, and their job as kids is to push back against it. Even though they may say they don’t like it, their actions say otherwise. Over and over again I saw how much more my kids relaxed when they knew what was expected, what their parameters were, and what was next.”

OandRBlog-6-5-14-IM1.jpg

Start by simplifying, sorting, and storing. Simplify things by inviting your kids to help choose which outgrown toys and clothes can be passed on to other children. It’s never too early to introduce them to the concept of passing on well-loved items to others in need! Show them how to sort like toys with like, and delegate those with small parts--legos, doll clothes, blocks--into piles that they can corral in clear plastic boxes with lids. Label these using a large font or even with picture labels if your children are pre-readers, and store them on shelves they can access.

OandRBlog-6-5-14-IM2.jpg

Make sure the solutions fit the child. Take their height into consideration, and organize from the ground up. If you’re working with a younger age group, you want cubbies they can reach, lower shelves, step stools for light switches or higher shelves, and kid-size hangers in the closet. Let them choose what goes where. Think about hooks for hoodies and backpacks and hanging organizers or large baskets for action figures or stuffed animals. For the younger set you might want to organize and keep art supplies out of reach until you are sure they can use them unsupervised--high shelves that aren’t reachable with that step stool are perfect.

Maria Montessori, the Italian physician and educator who developed the Montessori system of education in the early 19th century, used a simple system in her classroom to keep her students engaged. She would display only so many materials for them to work with at a time on the shelves, and others would be packed away. Then she would remove the old ones and display the new ones. Adapt this logic in your younger children’s rooms. Instead of having everything out all at once, keep some toys and books sequestered and rotate things in and out on a bi-monthly basis. You’ll be amazed how fewer things can hold a young child’s attention for longer!

Implementing an organizing routine at a young age will make everyone’s life easier in the long run. Assign tasks that give your kids a sense of empowerment. Making their beds in the morning, picking up books and toys in the afternoon, and straightening the desk or dresser before bed helps them understand that even a little order can be a beautiful thing. Everyone sleeps better. Just a few minutes a day here and there gets them used to--and, with luck, desirous of!--a clean space to play and entertain their friends.

Happy Organizing!

Green Up Your Act! Getting Your Gardening Zone in Shape

Spring always seems to lead the charge when it comes to getting things in order. Maybe the inspiration comes from opening windows long closed against winter’s chill and feeling the sunshine flood in; maybe it’s hearing the robins’ song as soon as you open your eyes in the morning. Regardless, a true spring clean is never confined to just the inside of your home. It extends outside as you clear debris out of garden beds, cut back dead growth, and generally give the outside of your house the same facelift you gave the inside a few weeks back.

Getting your gardening gear in order makes all the difference to the success of your project. Whether you have a shed or a simply a dedicated area in your garage, here are a few tips to whip your green thumb zone into submission.

One of the most useful organizational tools for a gardening area is a bulletin board. Here’s where you hang your calendar of events: what you planted, when you fertilized, what’s coming up in your veggie garden, what tasks are ahead. You can also use it to tack up labelled envelopes for used seed packets, plant info stakes, or receipts for plantings that come from stores with a 12-month survival policy (like Home Depot). Having a simple gardening HQ keeps you on top of your home’s curb appeal.

OandRBlog-5-8-14-IM1.jpg

A ready-when-you-are garden carryall is a real timesaver. Anything with a handle is perfect for this--a basket or even an old-style milk delivery crate will do the trick. Stock it with gardening gloves, clippers, weeder, knee pads, and any other tools you always like to have close by. You may be surprised how much quicker it is now to weed the petunia bed!

Keeping as much off the floor as possible is key, so designate a hanging area for shovels, rakes, and hoes, and a few shelves with containers for smaller items. If you have space on the wall or the back of a door, a compartmentalized cloth shoe rack works well to store full seed packets, gardening stakes and twist ties, and smaller hand tools. Keep hoses and extension cords for power tools well coiled with Velcro straps.

At a certain age a potting station (which can be as simple as two sawhorses with a piece of wood or counter across them and a lattice against the wall) is the only civilized way to work on your planters and window boxes. It also provides storage underneath for soil, compost, and fertilizer. These large bags are best stored off the floor either in oversized plastic tubs or on a shelf. If you use chemicals in your garden, you might consider a locked box or high cabinet to ensure curious children can’t get at them.

Because soil is an integral part of the equation whenever you are talking gardening, your shed or garage gardening area is going to--you guessed it--attract dirt. Keep a small broom and dustpan on hand in this area to keep dust, dirt, and cobwebs at bay.

OandRBlog-5-8-14-IM2.jpg

Any project you tackle, inside or out, is always easier when the required tools are organized, visible, and easy to access. It’s amazing how much easier it is to head out to the garden when you don’t have to spend fifteen minutes searching for those elusive clippers. Give your green zone the same love you show the inside of your house and get paid back every day with a healthy, thriving garden.

Happy Organizing!

Garage Overhaul: Making Room for Your Car in Its Natural Habitat

It wasn’t that long ago that we lived in a world where garages were pretty much dedicated to one thing: parking our cars. These days, however, only 30% of Americans park in the garage. Of course, some people transform their garages into an extension of the house by creating a gym or a work space. But many of us are guilty of the same thing: using the garage to store years of clutter that forces our vehicles out into the cold.

Garages are magnets for “stuff.” Their wide open spaces are easily filled by outgrown sports equipment, oversize suitcases, or that fill-in-the-blank you’re going to refinish “one day.” You know how it goes once it starts--the pile just grows from there.

To get started on your overhaul, just do the same thing you do with every organizing project (even if you want to reach for the anxiety meds the second you think about tackling it): take a deep breath, break it into bite-sized pieces, and dive in.

OandRBlog-5-1-14-IM1.jpg

Sort

Start by sorting your stuff into the regular piles--keep, trash, recycle, donate--and then have a garage sale or charity pick-up to reduce the clutter. If you have a lot to get rid of, Bagster (a heavy-duty dumpster-in-a-bag that you fill and they dispose of) is a great solution. Sort the keeper items into categories--sports, garden, decorations, etc.--and put them in clear stacking boxes with lids. Make sure any paint you may have out there finds a new home inside; garage temps are too variable to safely store paint. Same goes for pet food, which attracts mice and should be corralled in the house.

OandRBlog-5-1-14-IM2.jpg

Visualize

The best way to tackle your garage is to start with a clean slate, because visualization is key. Once you have the clutter quieted down, draw a chalk outline on the floor of how much space you need for your car with the doors/hatch open. Then you can start planning for storage. Using vertical and ceiling space is critical in a garage project. You want shelves and hooks wherever you can use them. Can you fit shelves in front of your car? How about on the side? How much clearance do you have above the garage door? Map it out so you know what you need.

Paint

If you’re planning on painting, now is the time to break out the roller when the clutter is gone and the shelving isn’t yet installed. White is the least distracting color, but you can paint the walls orange and the ceiling turquoise if you want to; there’s no rule that the garage has to be drab and grey. If you’re really going swank, you can also epoxy the floor. Something like Quikrete Epoxy Garage Floor Coating will make sure your floor resists oil drips and that it wipes clean like a kitchen counter. It may even inspire you to ask people to remove their shoes before they walk into your garage!

OandRBlog-5-1-14-IM3.jpg

Reassign

Think carefully about how you’re going to divide the space. Pay attention to that chalk outline for your parking requirements since that’s the reason you’re undergoing this whole exercise. Then ponder how else you want to use the area. Crafting? Storage? Working out? A workbench and tool zone? Thanks to automatic door openers, the vast majority of us now enter and leave our homes through the garage, so think about what can be adjusted around that entryway to make it more useful. Coat/backpack hooks at kid level? Shoe storage? Maybe you want to paint the back of the door or spruce up that zone a little if guests enter your home with you through the garage.

Store

Use high shelves for seasonal decorations, tools you rarely use, luggage, and memorabilia. If you store cleaning supplies in the garage, you’ll want a wall area reserved for a hanging system for brooms and mops along with some shelves for cleaners and spray bottles. Pegboard can be used for lighter items; it’s easy to hang, you can paint it to provide a pop of color on an otherwise plain wall, and it can be easily cut to size to fit any space. Use track shelves for heavier items and affix the tracks to wall studs. Your ceiling is a great zone for large flat items, gardening implements, and ladders. (Just make sure to avoid a face palm moment by checking and then obsessively double checking that you haven’t interfered with operating the garage door.) Reserve the easily accessed eye-level shelves for anything in high rotation in your family’s lives.

And now...the moment you’ve been waiting for. Drum roll, please! Start your car and pull it into its new home. Then sit back and wait for the envious neighbors to arrive in droves.

Happy Organizing!

Seasonal Closet Shuffle: Out with the Sweaters and Scarves, in with the Light and Bright

Daffodils. Crocuses. Poolside margaritas.

Okay, margs by the pool in mid-April are a stretch in most areas of the U.S. (yes, we woke to snow in Boulder this week), but weather with a hint of summer is definitely arriving and, with it, the potential to maximize your closet space. Rotating out woolly sweaters and bulky jackets that suck up precious closet real estate and re-stocking your space with breezy shirts, tees, tank tops, and flip-flops is one of early spring’s most gratifying rituals. I can taste the salt on the rim just thinking about it.

All clothing projects start with--gold star if you know the answer!--that ruthless purge I like to encourage at any opportunity. Go through clothes with a critical eye, discarding what no longer works or fits. Get rid of stuff you haven’t worn and fling out anything you’ve tried on several times but always end up taking off at the last second. Why is it that certain clothes are forever the ugly stepsisters who never make it to the ball? And, honestly, if they haven’t by now, will they ever actually get there?

Most of us organize into two seasons: spring/summer and fall/winter. The idea is to pack the old season away to make room for the new. If you have the space or prefer to keep all your clothing in your closet, you can still separate out by season and file the current season front and center and the other in the back.

Here’s how you do it.

OandRBlog-4-17-14-IM1.jpg

First, make time. Pulling everything out of your closet, cleaning it, and then re-organizing it takes a few hours. I like to make sure I have a clear pathway to my closet from the folding and sorting area, otherwise known as my bed, so do a quick rearrange if need be to ensure that.

Before you begin you should know where and how you’re going to store clothing. Is it going to the basement on racks? Into storage containers on high shelves or under the bed? What do you need to make sure the task is as streamlined as possible? Gather boxes, garment bags, wooden hangers, large Ziplocs, or whatever supplies you require, and keep them close at hand.

As you begin, move methodically in one direction across your closet. Sort into piles: to be laundered, to be stored, to be given away, to be consigned (might as well make a little money if you can). Remember, you’re also purging while you’re doing this, so your donation bag should be getting a workout. When you finish, all that should remain are the crossover clothes that you may need for unpredictable weather; a few sweaters, a mid-weight jacket, a couple of long-sleeved tees, etc.

OandRBlog-4-17-14-IM2.jpg

Do your drawers the same way--move in one direction across them, pulling out the old and useless, storing the clean, and dropping anything in the laundry basket that needs to be washed but will ultimately be stored. Keep like items together so that in six months when you’re doing the reverse, items will already be organized and easy to reinstate.

Making sure that everything you’re storing has been laundered or dry cleaned is critical--you want to avoid stains becoming permanent. If you’re using boxes, consider tossing in a dryer sheet or two for freshness. Depending on the climate where you live, you may need lavender or cedar balls to deter critters. You want to make sure you don’t hang sweaters or knitwear that can become misshapen over time; instead, arrange them in storage containers with the heaviest on the bottom and the lightest on the top. You can also store any items you buy on sale at the end of the season that you’ll discover as “new” when you’re reversing the process in six months.

As much as it’s tempting to just hang and rearrange the incoming clothes, take a few extra minutes to clean your closet, drawers, and shelves while empty. Bust out the hose attachment on your vacuum, and get those corners sparkling. Then, and only then, bring in your spring clothes to colorize and categorize.

Make sure you store things out of sunlight or away from any extreme temperature fluctuations: think clean, cool, dark, and dry. A guest-room closet is a good solution for off-season clothes that need hanging space as long as you don’t have to rearrange the closet to accommodate the guest. Zippered portable closets can be stored in the basement, or rolling racks with garment (or even garbage) bags work well.

A side benefit of a critical examination of your wardrobe like this is that fewer things to try on equals less time getting dressed. But the really satisfying part of a spring closet shuffle is to see your wardrobe ready for barbecues, picnics, and those poolside margaritas. Can someone pass the guacamole, please?

Happy Organizing!

A Little TLC for Your Kitchen - and My Guilty Secret.

I love food. I love cooking it, eating it, and sharing it. It naturally follows that I love my kitchen too. Even though it’s not quite the dream kitchen I would design if I found $50,000 lying around on the counter, it’s my comfort zone. That’s why every January, I give it the love it deserves by organizing it from--literally--soup to nuts.

I start by emptying out all the drawers and cleaning them. In my experience, cleanliness brings renewed energy into a space. Next, I group all the like items on the counter and look them over with a fresh eye. Is anything repeated? Are there utensils I never use? If so, I give them away or recycle them. Editing gadgets is a great stress reducer when you open your utensil drawer and don’t have to paw through it for five minutes looking for what you need.

I then reassemble my drawers with the clear Linus organizers from The Container Store, which I've also cleaned. There are shallow and deep ones, which I mix and match depending on need, but I always maintain the same depth in each individual drawer.  Organizational tools and supplies don’t have to be expensive or fancy--what’s important is to choose something you’re comfortable with and will use. I like the clear organizing trays because I can really see what’s in them.

OandRBlog-1-16-14-IM1.jpg

A junk drawer is essential to any kitchen, and it’s a great place to store those things you want at your fingertips but that never seem to have an obvious home--matches, pens, pencils, scissors, string, Post-it notes, etc. When I empty mine out and purge it in January I never know what I’m going to find in there--but I always know it will be interesting!  When I put it all back in, using the same see-through Linus organizers, I organize the contents in a different way to make sure I notice what’s in there.

Next, I do the same thing with the cupboards--a thorough clean and purge. It’s amazing how obvious the lesser used items become when everything’s out and similar things are grouped together. Why do I have so many mixing bowls? What about that grill pan I never seem to take out? And when the cupboards are empty, I think about how my current layout is working and how I can improve it when I put things back. Of course, I’m always repeating my mantra to myself: “Do I use it? Do I love it? Do I appreciate it?” This helps me make decisions without sentimentality getting in my way.

Once all that’s clean and reassembled, I move on to the food cupboards and the under the sink zone. Food items get edited with a ruthless eye, especially the classic “this looks cool, I bet I’ll use it!” that’s still sitting there a year later. Then I wipe down the shelves and only put back the items I know I will use, grouped by type. Ergonomics are key to organizing any space and I always order in a way that makes sense for my needs—healthy and most-used items at eye level, baking items all together, pet food on the bottom, etc. In my pantry, I use containers with labels to group smaller items together and especially love frosted totes in this zone. I create a typewritten label in all caps using a label maker for a clean and organized look.  

OandRBlog-1-16-14-IM2.jpg

I leave under the sink till last and am always stunned by how satisfying a thorough cleaning and edit of that generally neglected space is.

Okay. I know I've encouraged you not to double or triple up on gadgets (a client I worked with once had four blenders and wasn't willing to give any up), but I have a confession to make: I have three ice cream makers. My guilty secret is out! But here’s the thing: I love homemade ice cream, and I like to have more than one flavor at once. What’s a girl to do?

Happy Organizing!

Sheryl

Ready..Set...GO (Get Organized)!

OandRBlog-1-14-14.jpg

Something about January and a fresh new year ahead always gets me thinking: What will this year bring? What will I conquer, what dreams will I fulfill? It’s always exciting to welcome in a new year and watch it unfold.

This year is the tenth anniversary of national “Get Organized” (GO) month, which is--you guessed it!--January. Different chapters of the National Association of Professional Organizers (NAPO) are hosting several events to inspire you--and to help you get your life, your office, or your home organized.

Something NAPO talks about that might appeal to you if you like to write your goals down is the concept of a SMART goal. Many of us fail regularly at meeting goals, so my advice is not to set any unless they’re SMART. (If just the mention of the word “goal” makes you start to twitch uncontrollably, the Nike slogan “Just do it!” probably works better for you). A SMART goal is Specific, Measurable, Attainable, Relevant, and Time-Sensitive--elements that actually make it realistic. So instead of setting a vague goal like “In January I’m going to organize my kitchen,” a SMART goal breaks it down like this: “By Super Bowl Sunday, I’m going to have cleaned out my pantry, purged dishes and utensils in my cupboards and drawers, and given away, recycled, or thrown out things I never or rarely use.” With a SMART goal, you know what’s expected, when it must be completed, and what it involves. Suddenly, it becomes a target you can hit. (Alternatively, you could “just do it!”)

Another excellent project for January now that the business year has come to a close is organizing your office. What files can be collapsed together or retired? What can be digitized? Did you use the staple remover in your top drawer once in 2013? What SMART goal can you set to get your office organized--and that will result in making your work day twice as efficient? (Or what frustration do you have to run into in your file drawer to get you to drop what you’re doing and “just do it!”)

For my part in GO month, I’m going to share tips on organizing different spaces. We’ll kick off this Thursday with the kitchen, my favorite zone, and then move on to other rooms. If there’s an area you’re particularly interested in, leave me a comment and I’ll be happy to add it to the list. I challenge you to follow along with your own organizing project, set a SMART goal, or “just do it!” And don’t wait for a big chunk of time to take it on--chip away at it in any unexpected half-hours that present themselves. Who knows? You may not even notice how organized you’re becoming.

Happy Organizing!

Sheryl

Holiday Organizing - and Some Old World Memories

OandRBlog-12-18-13.jpg

Snow crunching underfoot, houses outlined in sparkly lights, the smell of freshly baked cookies wafting out of the kitchen--the holidays are here again!

Christmas always takes me back to warm memories of my mother’s nanny, Molly. My grandmother died in 1948 and Molly came over from Denmark to LA to look after my mom and her two siblings. She was a true mother to those kids and a grandmother to me. She loved Christmas, and every year she covered coffee tins with contact paper and filled them with her famous Danish currant cookies to give as gifts. My mouth waters just remembering their buttery texture. But what really makes me think of Molly is when I take out my Christmas boxes and carefully unpack the handmade yarn Santas she gave to my mother before she died. These Old World Danish decorations bring the holiday spirit into my home like nothing else I own.

While I was decorating and remembering Molly this past week, I started thinking about holiday organizing and how beneficial a good system is. Let’s face it: by the end of the season we all feel the temptation to simply stuff everything in boxes as quickly as possible and get them out of sight for another year. But there are other ways to do this that lessen stress, free up time, and create some welcome ease. It just takes a little planning. Next year, when the season rolls around again, I’m always glad I did it.

I thought I’d share some tips and tricks that make my holidays a breeze:

  • The Container Store sells affordable, see-through boxes in different sizes that will accommodate small items like table decorations and ornaments or larger items like wrapping paper and garlands (or to save money, you can hang on to segmented wine boxes and cardboard egg cartons to store ornaments and breakable items)

  • Label all boxes in full capital letters for easy readability (I use a label maker but you can also print them or neatly hand-write them)

  • Designate “open first” boxes to streamline your decorating

  • If it’s broken, if you hate it, or if you never use it, give it away or properly dispose of it

  • Test light strings before putting them away to make sure you’re ready to go next year

  • Wind light strings around cardboard and stack them in a bin to save you from detangling a mess next year

  • Keep a stash of “neutral gifts” already wrapped to give to guests who show up with an unexpected gift for you; olive oil, chocolate, wine or candles

  • Keep a list for next year of items you know you’ll need, or shop the after-Christmas sales to get inexpensive lights and decorations to pack away 

When it comes to anything in my home, seasonal or otherwise, my philosophy is pretty simple. I ask myself: Do I use it, do I love it, do I appreciate it? Any item I have must clear at least one of these hurdles. It seems to me that the holidays are an especially good time to ask myself these questions as I get out things I don’t see that often.

You’ll be happy to know that Molly’s Santas received my highest rating--a thumbs-up in each category. They’re staying.

Merry Christmas, Happy Hanukkah, Happy Whatever Holiday You Celebrate, and, of course, Happy Organizing!

Sheryl